If you have recently updated or upgraded to Windows 10, then chances are your Start Menu may not work properly, making it impossible for users to navigate around Windows 10. Users are experiencing various issues with Start Menu such as Start Menu does not open, Start Button is not working, or Start Menu freezes etc. If your Start Menu isn’t working then don’t worry as today we will see a way to fix this issue.

This exact cause is different for different users because each user has a different system configuration and environment. But the problem can be related to anything like corrupted user account or drivers, damaged system files, etc. So without wasting any time, let’s see How to Fix Start Menu Not Working in Windows 10 with the help of the below-listed tutorial.
Fix Start Menu Not Working in Windows 10
Make sure to create a restore point just in case something goes wrong.
To run Command Prompt as an administrator, press Ctrl + Shift + Esc to open Task Manager. Then click on File then select Run new task. Type cmd.exe and checkmark “Create this task with administrative privileges” then click OK. Similarly, to open PowerShell, type powershell.exe and again checkmark the above field then hit Enter.

Method 1: Restart Windows Explorer
1. Press Ctrl + Shift + Esc keys together to launch the Task Manager.
2. Find explorer.exe in the list then right-click on it and select End Task.

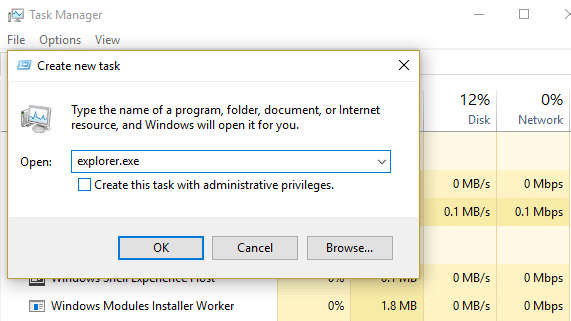
3. Now, this will close the Explorer and to rerun it, click File > Run new task.

4. Type explorer.exe and hit OK to restart the Explorer.
5. Exit Task Manager and see if you’re able to Fix Start Menu Not Working in Windows 10.
6. If you’re still facing the issue, then log out from your account and re-login.
7. Press Ctrl + Shift + Del key at the same time and click on Signout.
8. Type in your password to login to Windows and see if you’re able to fix the issue.
Method 2: Create a new local administrator account
If you’re signed with your Microsoft account, then first remove the link to that account by:
1. Press Windows Key + R then type “ms-settings:” (without quotes) and hit Enter.
2. Select Account > Sign in with a local account instead.

3. Type in your Microsoft account password and click Next.

4. Choose a new account name and password, and then select Finish and sign out.
#1. Create the new administrator account:
1. Press Windows Key + I to open Settings and then click Accounts.
2. Then navigate to Family & other people.
3. Under Other people click on “Add someone else to this PC.”

4. Next, provide a name for the user and a password then select Next.

5. Set a username and password, then select Next > Finish.
#2. Next, make the new account an administrator account:
1. Again open Windows Settings and click on Account.

2. Go to the Family & other people tab.
3. Other people choose the account you just created and then selected a Change account type.

4. Under Account type, select Administrator then click OK.

#3. If the issue persists try deleting the old administrator account:
1. Again go to Windows Settings then Account > Family & other people.
2. Under Other users, select the old administrator account, click Remove, and select Delete account and data.

3. If you were using a Microsoft account to sign in before, you can associate it with the new administrator by following the next step.
4. In Windows Settings > Accounts, select Sign in with a Microsoft account instead and enter your account info.
Finally, you should be able to Fix Start Menu Not Working in Windows 10 as this step seems to fix the issue in most cases.
Method 3: Run Start Menu Troubleshooter
If you continue to experience Start Menu’s issue, it’s recommended to download and run Start Menu Troubleshooter.
1. Download and run Start Menu Troubleshooter.
2. Double click on the downloaded file and then click Next.

3. Let it finds and automatically Fixes Start Menu Not Working in Windows 10.
Method 4: Run System File Checker (SFC) and Check Disk
1. Open Command Prompt. The user can perform this step by searching for ‘cmd’ and then press Enter.

2. Now type the following in the cmd and hit enter:
Sfc /scannow
sfc /scannow /offbootdir=c:\ /offwindir=c:\windows

3. Wait for the above process to finish and once done, restart your PC.
4. Next, run CHKDSK from Fix File System Errors with Check Disk Utility(CHKDSK).
5. Let the above process complete and again reboot your PC to save changes.
Method 5: Force Cortana to Rebuild Settings
Open Command Prompt with administrative rights then type the following one by one and hit Enter after each command:
CD /d "%LOCALAPPDATA%\Packages\Microsoft.Windows.Cortana_cw5n1h2txyewy"
Taskkill /F /IM SearchUI.exe
RD /S /Q Settings

This will force Cortana to rebuild the settings and will Fix Start Menu and Cortana Not Working in Windows 10.
If the issue is still not resolved, follow this guide to fix any issues related to Cortana.
Method 6: Re-Register Windows App
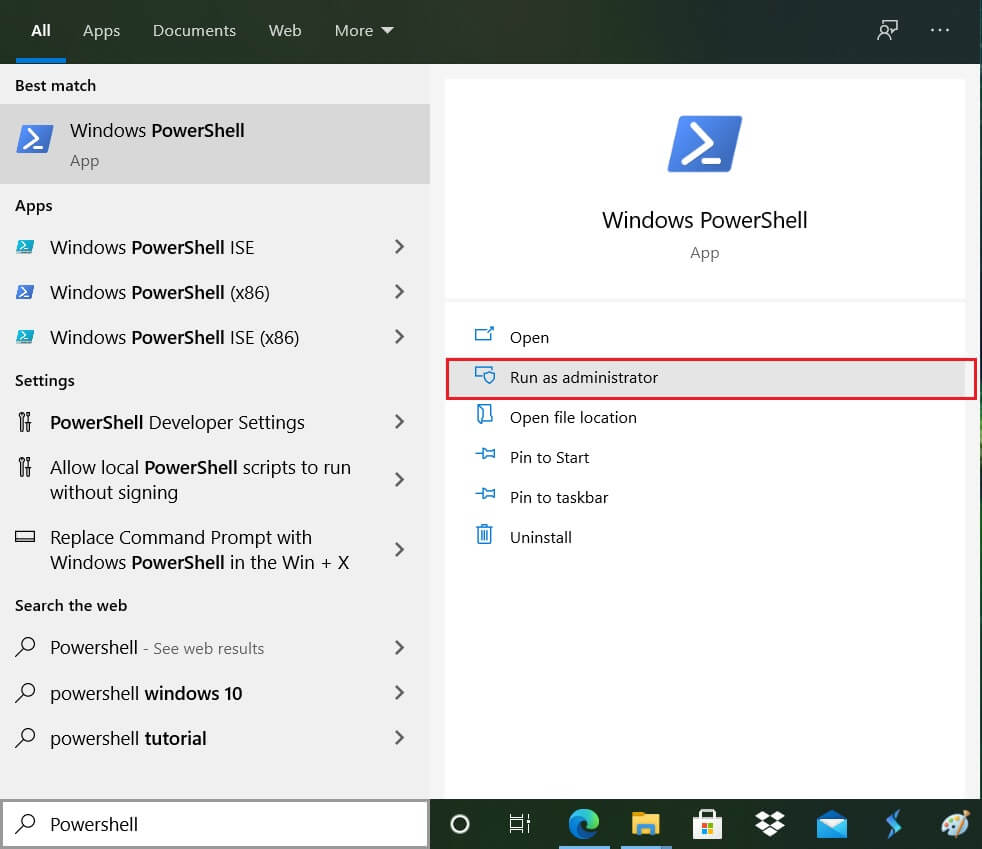
1. Type PowerShell in Windows Search then right-click on PowerShell and select Run as Administrator.
2. Now type the following command into PowerShell window:
Get-AppXPackage -AllUsers | Foreach {Add-AppxPackage -DisableDevelopmentMode -Register "$($_.InstallLocation)\AppXManifest.xml"}

3. Wait for the Powershell to execute the above command and ignore the few errors which may come along.
4. Reboot your PC to save changes.
Method 7: Registry Fix
1. Press Ctrl + Shift + Esc to open Task Manager then click on File and select Run new task.
2. Type regedit and checkmark “Create this task with administrative privileges” then click OK.

3. Now navigate to the following registry key in the Registry Editor:
Computer\HKEY_LOCAL_MACHINE\SYSTEM\CurrentControlSet\Services\WpnUserService
4. Make sure to select WpnUserService then in the right window double-click on the Start DWORD.

5. Change its value to 4 then click OK.

6. Reboot your PC to save changes.
Method 8: Refresh or Reset Windows 10
Note: If you can’t access your PC, restart your PC a few times until you start Automatic Repair. Then navigate to Troubleshoot > Reset this PC > Remove everything.
1. Press Windows Key + I to open Settings then click on Update & Security icon.
![]()
2. From the left-hand menu select Recovery.
3. Under Reset this PC, click on the “Get Started” button.

4. Select the option to Keep my files.

5. For the next step, you might be asked to insert Windows 10 installation media, so ensure you have it ready.
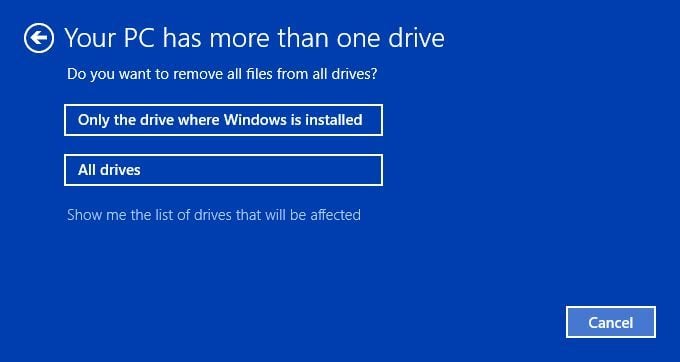
6. Now, select your Windows version and click on only the drive where Windows is installed > remove my files.
5. Click on the Reset button.
6. Follow the instructions on the screen to complete the reset.
Recommended:
- Fix Realtek High Definition Audio Driver Issue
- Rebuild Font Cache in Windows 10
- Enable Enhanced Anti-Spoofing for Windows Hello Face Authentication
- Fix Bluetooth can’t turn off on Windows 10
That’s it you have successfully Fix Start Menu Not Working in Windows 10 but if you still have any queries regarding this tutorial then feel free to ask them in the comment’s section.