
Fix NVIDIA Drivers Constantly Crash on Windows 10: Users are reporting that NVIDIA drivers keep on crashing on Windows 10 and they might not be able to play games, also they are experiencing lag and rendering issues. In addition to this, they are also experiencing Display freeze or stuck for few minutes then the NVIDIA drivers again recover which make everything back to normal. But the main problem is that this happens every 5-10 minutes which is very annoying, thankfully there are different ways you could fix this issue in Windows 10.

The possible reason for this problem seems to be corrupted or outdated drivers but in some cases, the newer drivers are the main reason for the crash and uninstalling then going back to older drivers seems to fix the issue. So without wasting any time let’s see how to fix this issue with the below-listed troubleshooting steps.
Fix NVIDIA Drivers Constantly Crash on Windows 10
Make sure to create a restore point just in case something goes wrong.
Method 1: Enable Graphic Card and Update Drivers
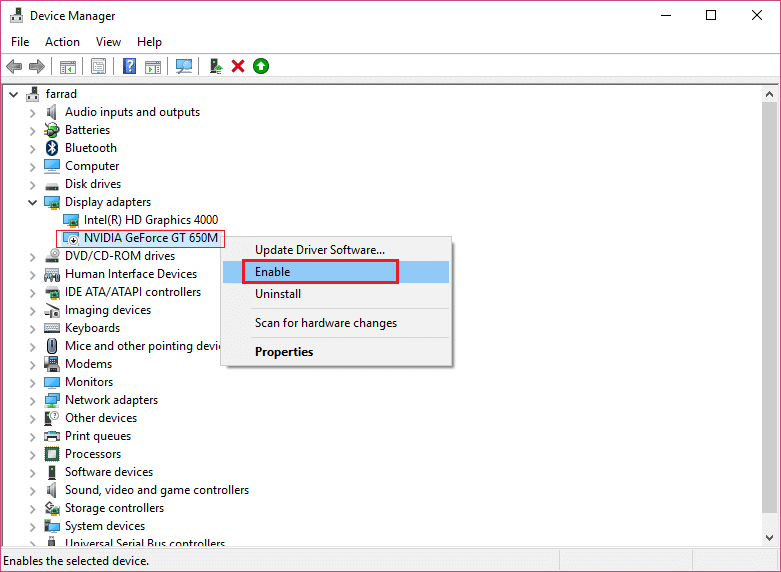
1.Press Windows Key + R then type devmgmt.msc and hit Enter to open Device Manager.

2.Next, expand Display adapters and right-click on your NVIDIA Graphic Card and select Enable.
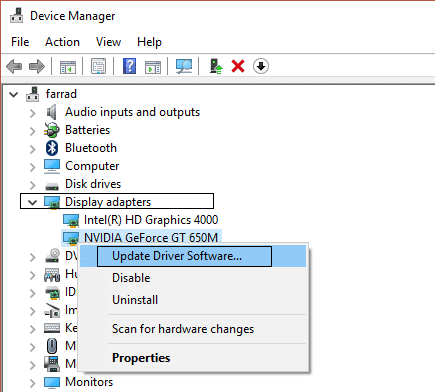
3.Once you have done this again right-click on your graphic card and select “Update Driver Software.“
4A.Select “Search automatically for updated driver software” and let it finish the process.

4B. Again select “Update Driver Software” but this time on the next screen select “Browse my computer for driver software.“

5.Now select “Let me pick from a list of device drivers on my computer.”

6.Finally, select the compatible driver from the list for your NVIDIA Graphic Card and click Next.
7.Let the above process finish and restart your PC to save changes. After updating Graphic card you may be able to Fix NVIDIA Drivers Constantly Crash on Windows 10.
Method 2: Update Drivers from NIVIDA website
1.Press Windows Key + R and in the dialog box type dxdiag and hit Enter.

2.After that, click on the Display 2 tab and find out your graphic card.

3.Now go to the NVIDIA driver download website and enter the product details which we just find out.
4.Search your drivers after inputting the information, click Agree and Download the drivers.

5.After successful download, install the driver and you have successfully updated your NVIDIA drivers manually. This installation will take some time but you will have successfully updated your driver after that.
Method 3: Roll back Drivers
1.Again go to Device Manager then expand Display adapters and right-click on your NVIDIA graphic card and select Properties.
2.Now switch to Driver tab and click Roll Back Driver.

3.Once the Drivers are rolled back, reboot your PC to save changes.
4.This would definitely Fix NVIDIA Drivers Constantly Crash on Windows 10 then continue with the next method.
Method 4: Install older version of NVIDIA drivers
1.Right-click on your NVIDIA graphic card in Device Manager and select Uninstall.
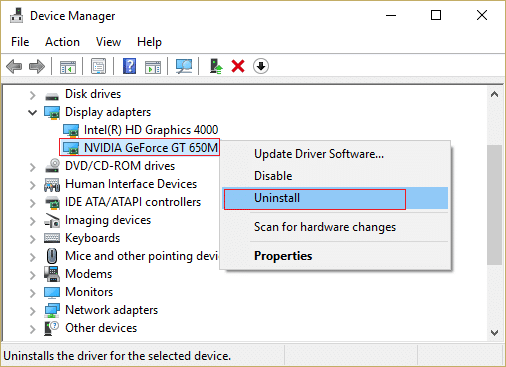
2.If asked for confirmation select Yes.
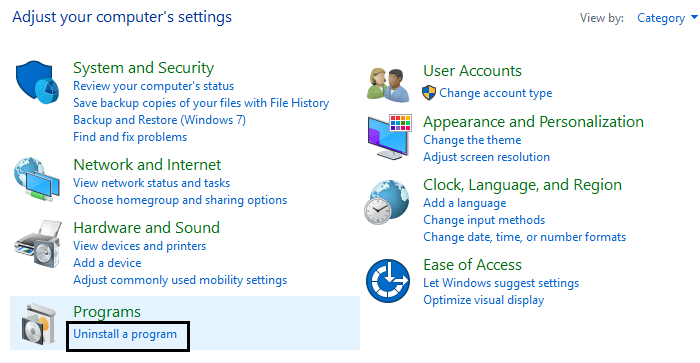
3.Press Windows Key + X then select Control Panel.

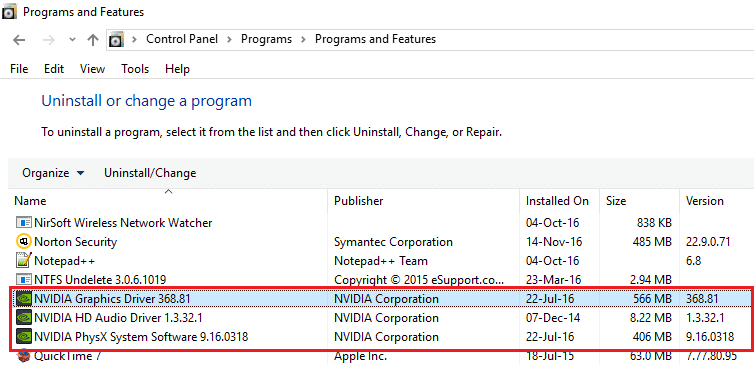
4.From Control Panel click on Uninstall a Program.
5.Next, uninstall everything related to Nvidia.
6.Reboot your system to save changes and again download the setup (follow Method 2). But this time make sure you only download the previous version setup, not the latest version.
5.Once you are sure that you have removed everything, try installing the drivers again. The setup should work without any problems.
Method 5: Disable Vsync and Select Maximum Performance Settings
1.Right-click on the desktop area then click NVIDIA Control Panel.

2.Now click on Manage 3D settings.
3.Set Power Settings to Maximum Performance and turn off Vertical Sync.
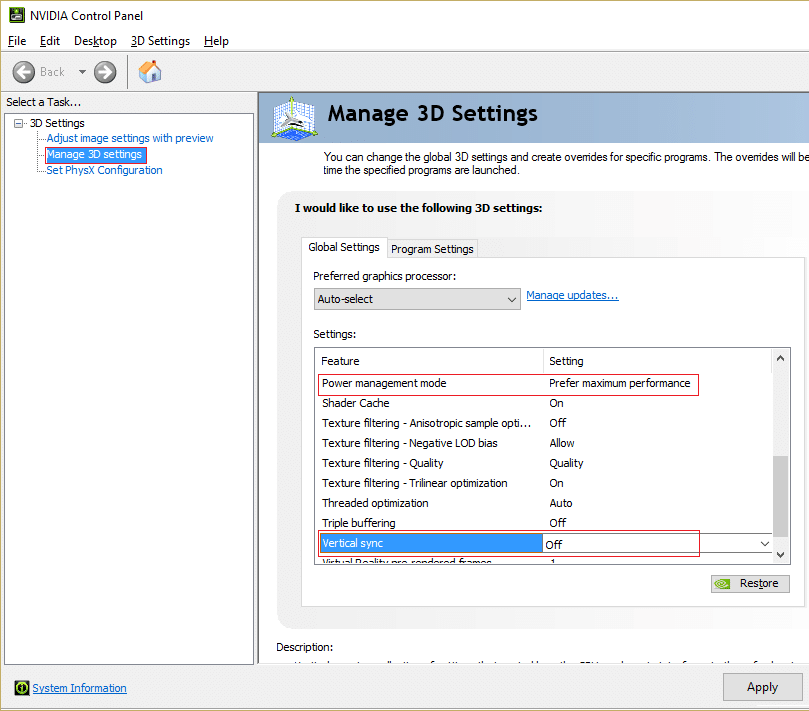
4.Click Apply to save changes.
5.Right click battery icon on the system tray and select Power Options.

6.In the Power Options window select High Performance under Choose or customize a power plan.
7.Reboot your PC to save changes.
Method 6: Update DirectX
To Fix NVIDIA Drivers Constantly Crash issue on Windows 10, you should always make sure to update your DirectX. The best way to make sure you have the latest version installed is to download DirectX Runtime Web Installer from Microsoft official website.
Method 7: Temporarily Disable Antivirus and Firewall
Sometimes the Antivirus program can cause nvxdsyn.exe error or NVIDIA Drivers Constantly Crash issue. you need to disable your antivirus for a limited time so that you can check if the error still appears when the antivirus is off.
1.Right-click on the Antivirus Program icon from the system tray and select Disable.

2.Next, select the time frame for which the Antivirus will remain disabled.

Note: Choose the smallest amount of time possible for example 15 minutes or 30 minutes.
3.Once done, again try to connect to the WiFi network and check if the error resolves or not.
4.Right click on Taskbar, select Control Panel.
5.Next, click on System and Security.
6.Then click on Windows Firewall.

7.Now from the left window pane click on Turn Windows Firewall on or off.

8.Select Turn off Windows Firewall and restart your PC. This would definitely Fix NVIDIA Drivers Constantly Crash on Windows 10.
If the above method doesn’t work make sure to follow the exact same steps to turn on your Firewall again.
Recommended for you:
- How to Remove File Type Associations in Windows 10
- Fix Setup couldn’t start properly. Please reboot your PC and run set up again
- 4 Ways To Fix Red X On Volume Icon
- Fix Windows Update Error 0x8024a000
That’s it you have successfully Fix NVIDIA Drivers Constantly Crash on Windows 10 if you still have any queries regarding this post feel free to ask them in the comment’s section.


This information is great however I cannot even start my pc because each time it tries to boot it comes up with the dreaded blue screen error message ! HELP
I’ll try it. I’m really sick of all this bugs with my Dell XPS 15 – it suppose to be a high performance notebook, but NVidia makes is so hard that I’m really considering never buying a NVidia card again. Thanks for the tips, mate 😉
The one and only solution for nvidia crashes (kernel event 141) is to find in your BIOS: PCIE spread spectrum (on or auto by default) and change it to off 😉 The nvidia issue is not a driver issue, its a frequency issue(SSC);) Enjoy your Nvidia products;)
I have a Dell XPS 8930 and experienced similar problems after October 2018. Just random reboots whilst in various tasks. Checked hardware which showed no faults, and several other diagnostic tools to find the cause(s). So frustrating! I’d tried everything I could find to solve this problem. Finally this week, I did yet another scan of the system with sfc /scannow which threw up some file corruptions which were corrected, but didn’t fix the problem. Decided to check all driver software (again!!) in Device Manager and this time noticed in System Devices that the NVVHCI Enumerator had drivers that were not Microsoft Approved. Clicked ‘update driver’ and this installed the approved driver which finally solved the problem.
I’ve no idea how this problem happened in the first place, but I suspect either Windows Update or Nvidia’s own downloads.