
If you are facing the Non-System Disk or Disk Error Message on Startup, i.e. when the PC boots up, you are the right place as today we will discuss how to resolve this error. It basically means that your operating system is not accessible and you won’t boot to your Windows. The only option you have is to restart your PC, and again you will be presented with this error. You would be stuck in an infinite loop until this error is resolved.

The error indicates that the boot files or BCD information might have got corrupted; hence you won’t boot. Sometimes the main issue is boot order is changes and system can’t find the correct files to load your OS. Another silly problem which can cause this error is loose or faulty SATA/IDE cable that connects your hard disk to the motherboard. As you see, there is a various issue because you could face this error; therefore, we need to discuss all the possible solutions to fix this issue. So without wasting any time let’s see how to actually Fix Non-System Disk or Disk Error Message on Boot with the help of below-listed troubleshooting guide.
9 Ways to Fix Non-System Disk or Disk Error Message
Note: Make sure to remove any bootable CDs, DVDs or USB Flash drive attached to the PC before following the below-listed methods.
Method 1: Set Correct Boot Order
You may be seeing the error “Non-System Disk or Disk Error Message on Startup” because the boot order was not properly set, which means that computer is trying to boot from another source which doesn’t have an operating system thus failing to do so. To fix this issue, you need to set the Hard Disk as the top priority in the Boot order. Let’s see how to set proper boot order:
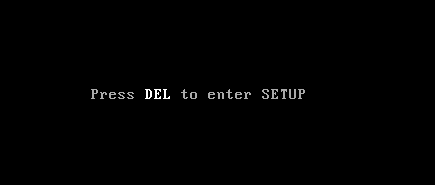
1. When your computer starts (Before the boot screen or the error screen), repeatedly press Delete or F1 or F2 key (Depending upon your computer’s manufacturer) to enter BIOS setup.
2. Once you are in BIOS setup, select the Boot tab from the list of options.

3. Now make sure that the computer Hard disk or SSD is set as a top priority in the Boot order. If not, use up or down arrow keys to set hard disk at the top, which means the computer will first boot from it rather than any other source.
4. Finally, press F10 to save this change and exit. This must-have Fix Non-System Disk or Disk Error Message, if not then continue.
Method 2: Check on your Hard Disk IDE or SATA cable
In most cases, this error occurs because of the faulty or loose connection of hard disk and to make sure that this is not the case where you need to check your PC for any fault in the connection.
Important: It is not recommended to open the casing of your PC if it’s under warranty as it will void your warranty, a better approach, in this case, will be taking your PC to the service center. Also, if you don’t have any technical knowledge then don’t mess with the PC and make sure to look for an expert technician who can help you in checking for faulty or loose connection of hard disk.

Once you have checked the proper connection of hard disk is established, reboot your PC, and this time you may be able to Fix Non-System Disk or Disk Error Message.
Method 3: Run Startup/Automatic Repair
1. Insert the Windows 10 bootable installation DVD or Recovery Disc and restart your PC.
2. When prompted to Press any key to boot from CD or DVD, press any key to continue.

3. Select your language preferences, and click Next. Click Repair your computer in the bottom-left.

4. On choose an option screen, click Troubleshoot.

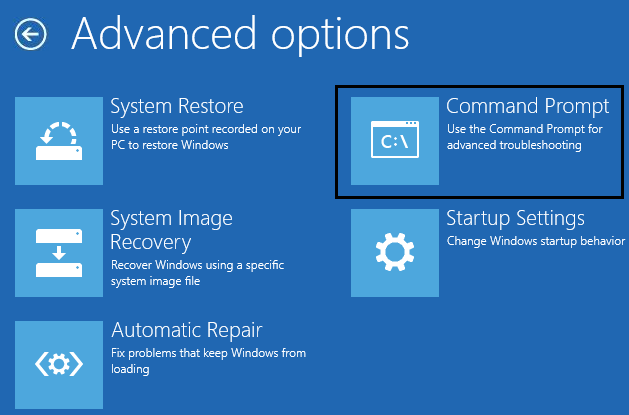
5. On Troubleshoot screen, click the Advanced option.

6. On the Advanced options screen, click Automatic Repair or Startup Repair.

7. Wait till the Windows Automatic/Startup Repairs complete.
8. Restart and you have successfully Fix Non-System Disk or Disk Error Message while booting, if not, continue.
Also Read: How to fix Automatic Repair couldn’t repair your PC.
Method 4: Repair or Rebuild BCD Configuration
1. Using above method open command prompt using Windows installation disk.
2. Now type the following commands one by one and hit enter after each one:
bootrec.exe /FixMbr
bootrec.exe /FixBoot
bootrec.exe /RebuildBcd

3. If the above command fails, then enter the following commands in cmd:
bcdedit /export C:\BCD_Backup
c:
cd boot
attrib bcd -s -h -r
ren c:\boot\bcd bcd.old
bootrec /RebuildBcd

4. Finally, exit the cmd and restart your Windows.
5. This method seems to Fix Non-System Disk or Disk Error Message on Startup but if it doesn’t work for you then continue.
Method 5: Hard Disk might be failing or damaged
If you can still not Fix Non-System Disk or Disk Error Message, then chances are your hard disk might be failing. In this case, you need to replace your previous HDD or SSD with a new one and install Windows again. But before running to any conclusion, you must run a Diagnostic tool to check if you really need to replace the Hard Disk or not.

To run Diagnostics restart your PC and as the computer starts (before the boot screen), press F12 key. When the Boot menu appears, highlight the Boot to Utility Partition option or the Diagnostics option press enter to start the Diagnostics. This will automatically check all the hardware of your system and will report back if any issue is found.
Method 6: Change the Active Partition in Windows
1. Again go to Command Prompt and type: diskpart

2. Now type these commands in Diskpart: (don’t type DISKPART)
DISKPART> select disk 1
DISKPART> select partition 1
DISKPART> active
DISKPART> exit

Note: Always mark the System Reserved Partition (generally 100Mb) active and if you don’t have a System Reserved Partition, mark C: Drive as the active partition.
3. Restart to apply changes and see if the method worked.
Method 7: Run Memtest86+
Note: Before starting, make sure you have access to another PC as you will need to download and burn Memtest86+ to the disc or USB flash drive.
1. Connect a USB flash drive to your system.
2. Download and install Windows Memtest86 Auto-installer for USB Key.
3. Right-click on the image file which you just downloaded and selected “Extract here” option.
4. Once extracted, open the folder and run the Memtest86+ USB Installer.
5. Choose you are plugged in USB drive to burn the MemTest86 software (This will format your USB drive).

6. Once the above process is finished, insert the USB to the PC, giving the Non-System Disk or Disk Error Message on Startup.
7. Restart your PC and make sure that boot from the USB flash drive is selected.
8.Memtest86 will begin testing for memory corruption in your system.

9. If you have passed all the test, then you can be sure that your memory is working correctly.
10. If some of the steps were unsuccessful, then Memtest86 will find memory corruption which means that your Non-System Disk or Disk Error Message on Startup is because of bad/corrupt memory.
11. In order to Fix Non-System Disk or Disk Error Message on Startup, you will need to replace your RAM if bad memory sectors are found.
Method 8: Change SATA configuration
1. Turn off your laptop, then turn it on and simultaneously press F2, DEL or F12 (depending on your manufacturer)
to enter into BIOS setup.
2. Search for the setting called SATA configuration.
3. Click Configure SATA as and change it to AHCI mode.

4. Finally, press F10 to save this change and exit.
Method 9: Repair Install Windows 10
If none of the above solutions works for you, you can be sure that your hard disk is fine, but you may see the error “Non-System Disk or Disk Error Message on Boot” because the operating system or the BCD information on the hard disk was somehow erased. Well, in this case, you can try to Repair install Windows but if this also fails then the only solution left is to install a new copy of Windows (Clean Install).
Recommended:
- Enable or Disable Thumbnail Previews in Windows 10
- Fix Windows could not automatically detect this network’s proxy settings
- Resolve Windows 10 Freezes Randomly Issue
- Change Lock Screen Timeout Setting in Windows 10
That’s it you have successfully Fix Non-System Disk or Disk Error Message but if you still have any questions regarding this post then feel free to ask them in the comment’s section.

in method 6, step 2, you feed diskpart a command specifying “disk 1”. in most cases (an always on single-disk systems), windows will be located on “disk 0”.
I’m using HP laptop and still it doesn’t remove the error message even I press delete button. I’m confused.