
Enable or Disable Underline Access Key Shortcuts in Windows 10: An access key is an underlined character in the menu item which gives you access to menu items by pressing a specific key on the keyboard. With an access key, the user can “click” a button by pressing the ALT key in combination with the predefined access key. After that use TAB key or arrow keys to navigate through the menu and press the underlined letter of the specific menu item you want to open. So without wasting any time let’s see How to Enable or Disable Underline Access Key Shortcuts in Windows 10 with the help of the below-listed guide.

Enable or Disable Underline Access Key Shortcuts in Windows 10
Make sure to create a restore point just in case something goes wrong.
Method 1: Enable or Disable Underline Access Key Shortcuts using Settings
1.Press Windows Key + I to open Settings then click on Ease of Access.

2.From the left-hand menu select Keyboard.
3.Now under the section “Change how keyboard shortcuts work” make sure to enable the toggle for “Underline access keys when available“

4.Restart your PC to save changes.
Method 2: Enable or Disable Underline Access Key Shortcuts using Control Panel
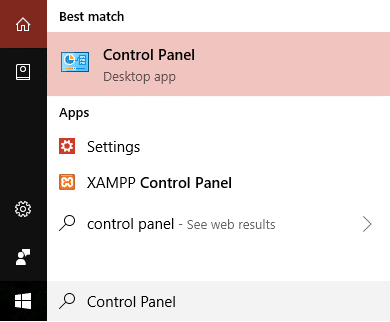
1.Press Windows Key + Q to bring up Search then type control and click on Control Panel from the search results.
2.Under Control Panel click on Ease of Access.

3.Again click on Ease of Access Center then click on “Make the keyboard easier to use“.

4.Scroll down to Make the keyboard easier to use section the checkmark “Underline Keyboard Shortcuts and Access Keys“.

5.Click Apply followed by OK.
6.Reboot your PC to save changes.
Method 3: Enable or Disable Underline Access Key Shortcuts using Registry
1.Press Windows Key + R then type regedit and hit Enter to open Registry Editor.

2.Navigate to the following Registry Key:
HKEY_CURRENT_USER\Control Panel\Accessibility\Keyboard Preference
3.If you want to Enable Underline Access Key Shortcuts then double-click on On and change it’s value to 1.

4.Similarly, if you want Disable Underline Access Key Shortcuts then change the value of On to 0.

5.Click OK to close the Registry Editor.
6.Reboot your PC to save changes.
Recommended:
- Change Color of Start Menu, Taskbar, Action Center, and Title bar in Windows 10
- Fix Windows Time Service not working
- Enable or Disable Password Expiration in Windows 10
- Change Maximum and Minimum Password Age in Windows 10
That’s it you have successfully learned How to Enable or Disable Underline Access Key Shortcuts in Windows 10 but if you still have any queries regarding this article then feel free to ask them in the comment’s section.


The methods to turn it off do not work. All they do is remove the underline from under the letters.
is there any way for me to change this ? not turn on or turn off! I want to change Underline and should be under the letter I chose it!
is this possible?